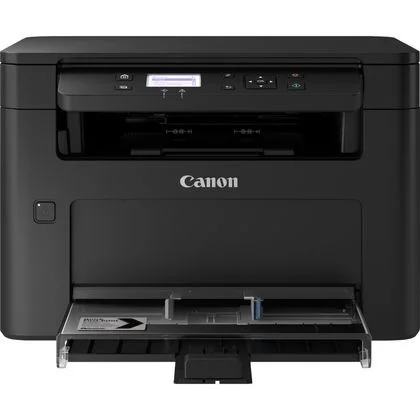
Canon Laser Non-MHC i-SENSYS MF112 | Reliable and Efficient
$158.55 $200.00
Canon Laser Non-MHC i-SENSYS MF112

Key Features:
- All-in-one functionality: Print, copy, and scan documents with ease.
- Fast print speeds: Produce high-quality prints at speeds of up to 22 pages per minute.
- Compact design: Save space on your desk with its sleek and compact design.
- Easy to use: Intuitive interface and simple setup.
- High-quality printing: Sharp, clear text and crisp images.
- Automatic document feeder: Efficiently scan and copy multi-page documents.
- Wireless connectivity: Print and scan from your smartphone or tablet.
- Energy-efficient: Low power consumption for cost savings.
Specifications: Canon Laser Non-MHC i-SENSYS MF112
- Print Technology: Laser
- Print Speed: Up to 22 ppm
- Print Resolution: Up to 600 x 600 dpi
- Paper Input Capacity: 150 sheets
- Paper Output Capacity: 50 sheets
- Connectivity: USB 2.0, Wi-Fi
- Dimensions: 372 x 255 x 320 mm
- Weight: 8.9 kg
Benefits: Canon Laser Non-MHC i-SENSYS MF112
- Cost-effective: Affordable purchase price and low running costs.
- Reliable performance: Consistent, high-quality output.
- Efficient workflow: Save time with fast print speeds and automatic document feeder.
- Versatile connectivity: Print and scan from various devices.
- Eco-friendly: Energy-efficient design reduces environmental impact.
If you’re looking for a reliable and affordable multifunction printer for your home or small office, the Canon i-SENSYS MF112 is a great option.
how to install the Canon Laser Non-MHC i-SENSYS MF112:
1. Unpack the Printer:
- Carefully remove the printer from the box.
- Remove all packing materials and protective tapes.
2. Connect the Power Cord:
- Plug one end of the power cord into the printer’s power socket.
- Plug the other end into a wall outlet.
3. Install the Toner Cartridge:
- Open the top cover of the printer.
- Remove the new toner cartridge from its packaging.
- Carefully insert the toner cartridge into the slot, ensuring it’s securely in place.
- Close the top cover.
4. Connect the Printer to Your Computer:
- USB Connection: Use a USB cable to connect the printer to your computer’s USB port.
- Wi-Fi Connection: Follow the printer’s manual to connect it to your Wi-Fi network.
5. Install the Printer Driver:
- Using the Installation CD: Insert the installation CD into your computer’s CD-ROM drive and follow the on-screen instructions.
- Manual Download: Visit the Canon website ([invalid URL removed]) and download the latest drivers for your operating system. Run the downloaded installer file and follow the prompts.
6. Configure the Printer:
- Once the driver is installed, you may need to configure the printer settings, such as paper size, print quality, and default settings.
- Refer to your printer’s manual for specific instructions.
| Weight | 8.9 kg |
|---|
Based on 0 reviews
Be the first to review “Canon Laser Non-MHC i-SENSYS MF112 | Reliable and Efficient”
Related products
-
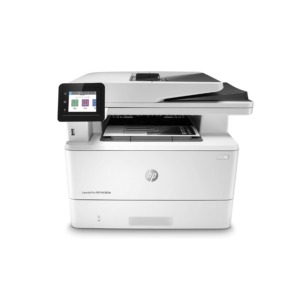
HP, Laserjet Printer, Printers
HP LaserJet MFP M442dn (8AF71A) – Efficient Monochrome Multifunction Printer for Businesses
-22% HP, Laserjet Printer, Printers
HP LaserJet MFP M442dn (8AF71A) – Efficient Monochrome Multifunction Printer for Businesses
HP LaserJet MFP M442dn 8AF71A

-
Connectivity, standard:Hi-Speed USB 2.0 Device, Ethernet 10/100 Base TX
-
Duty cycle (monthly, A4):Up to 50,000 pages per month
-
Paper handling input, standard:Tray 1: 100 sheet; Tray 2: 250 sheet
-
Print technology:Laser
SKU: n/a -
-
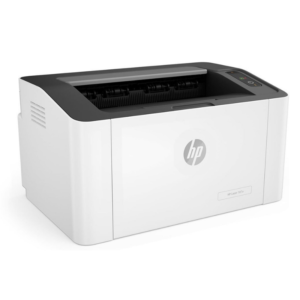
HP, Laserjet Printer, Printers
HP LaserJet Pro M107A Monochrome Printer – Compact and Efficient Laser Printing
-5%HP, Laserjet Printer, PrintersHP LaserJet Pro M107A Monochrome Printer – Compact and Efficient Laser Printing
HP LaserJet Pro M107A Monochrome

Brand HP Functions Print only Sub-brand LaserJet Printing Technology Laser Print colors Yes Processor speed 400MHz Connectivity Hi-Speed USB 2.0 port Paper Size A4, A5 SKU: 4ZB77A -


There are no reviews yet.